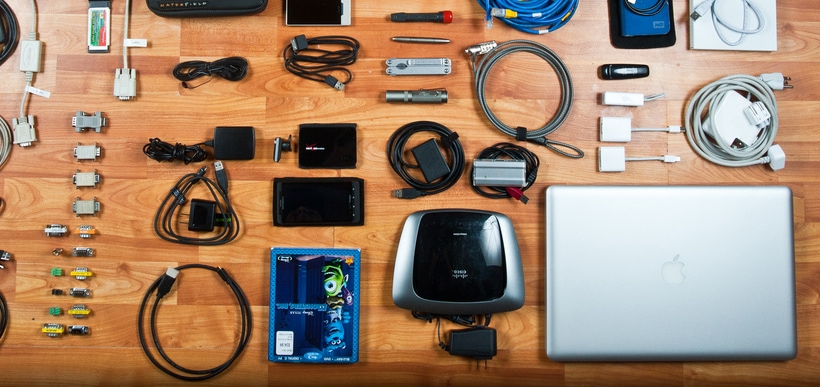
The latest and greatest must have iPad accessories

Whether you spoiling someone with a new iPad for the holidays or you just can’t resist doing a little shopping for yourself, there is a wide range of must have iPad accessories on the market right now. Both incredibly practical and fun to use, these items are great additions for any iPad owner.

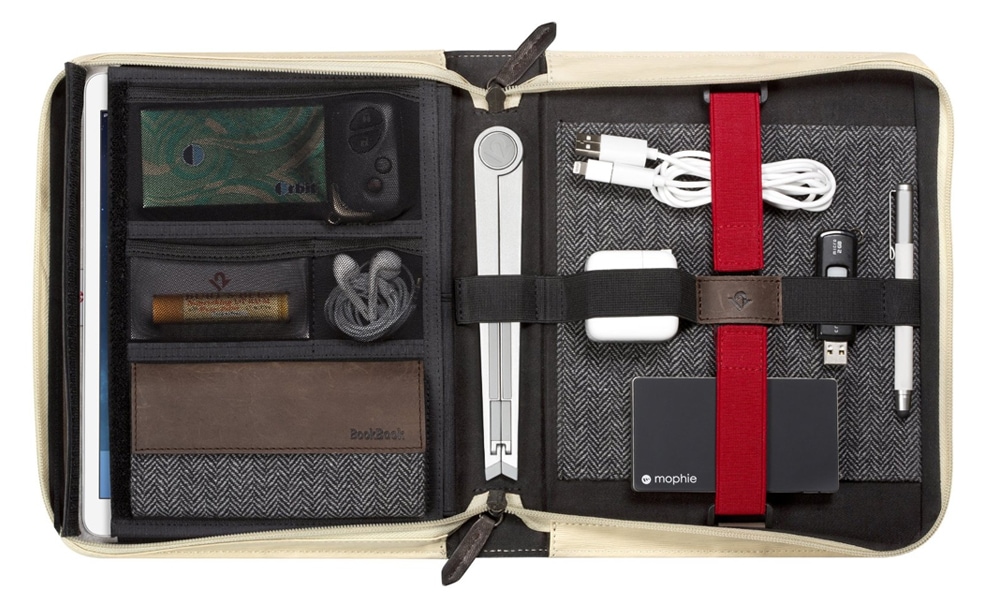
twelve-south-bookbook-travel-journal

Twelve South’s “BookBook Travel Journal” – $100

This new take on the previous, and popular, Book Book cases isn’t necessarily for those who prefer their gadgets and accessories be sleek and streamlined. It is, however, very useful and well made. Designed to look like a big, old book it disguises its true contents ingeniously. Zip it open and you’ll find secure storage for your iPad and any related “bits and bobs” such as headphones, chargers and camera kits. The Book Book Travel Journal is ideal to take on an airplane, as it sits nicely and opens easily on the folding tray table. Have everything you need easily accessible, without worrying about smaller items falling on the floor and rolling into the aisles.


logitech-ultrathin-keyboard-folio-iPad

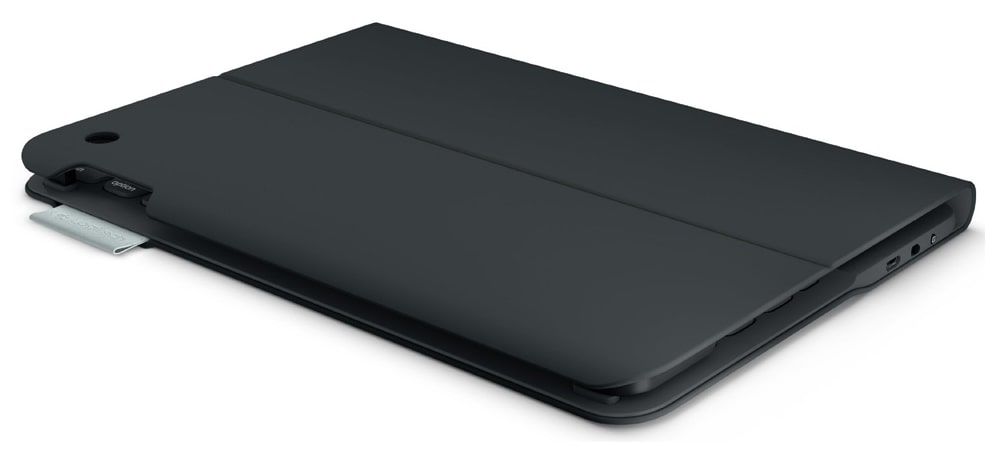
Logitech’s new Ultrathin cases for the iPad Air – $50 to $150

Logitech offers four different new cases designed specifically for the iPad Air, but they all have one thing in common. They’re fantastic. Three of them include keyboards, while one does not. The FabricSkin Keyboard Folio is the priciest investment, at $150. It is incredibly thin, water-repellent and features a built-in fabric keyboard. The Ultrathin Keyboard Cover, at $100, is also sleek. It’s comprised of an aluminum screen cover and built-in Bluetooth keyboard. The Ultrathin Keyboard Folio, also $100, is similar. However, it features a full folio case. And for just $50, the Folio Protective Case offers the same stylish protection for the iPad Air, sans-keyboard. Each of the keyboard-equipped cases charges via micro USB and is available to order in a variety of colours.


adonit-Jot-pro-stylus-pen

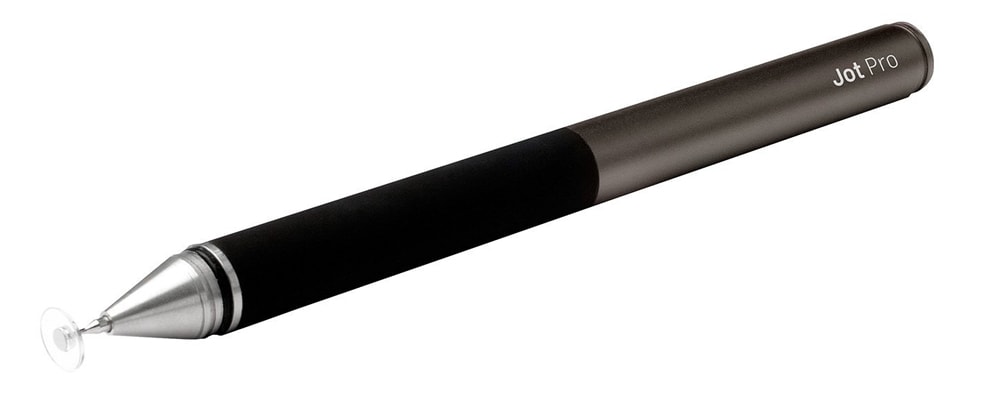
Adonit Jot Pro Fine Point Stylus for iPad – $75

If you’re similar to many iPad owners, you’d quite like to write on your tablet with a stylus but just haven’t found one that can truly duplicate the ease and comfort of traditional pen and paper. Wait no longer. This comfortable, streamlined stylus features a 1.9 mm tip. Writing with it mimics using a top-quality pen in the way no other stylus has been able to. The Adonit Jot Pro Fine Point Stylus is powered by AAA batteries and syncs with your tablet via Bluetooth 4.0.


apple-ipad-connection-kit

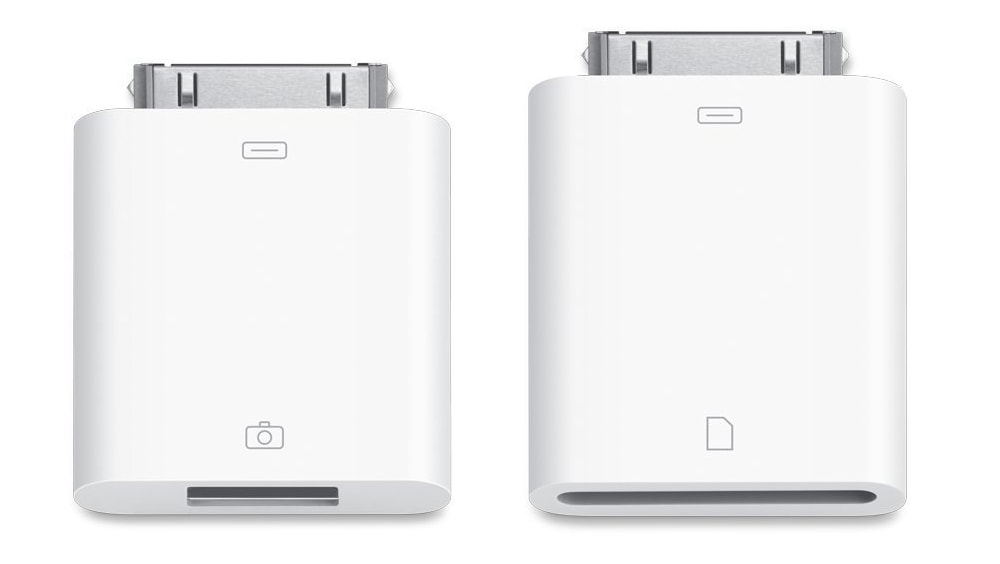
Apple’s Camera Connection Kit – $30

While it’s not new to the market, it’s still as useful and popular as it was when it first came out. This handy kit comes with 2 dongles that connect to the dock connector port on your iPad. One allows you to upload photos via USB and the other by SD Card Reader. An ingenious idea for anyone who takes a lot of photos on holiday yet doesn’t want to store them all in their camera or pack along cables and a laptop for uploading.


bose-soundlink-mini-bluetooth-speaker

Bose Soundlink Mini Bluetooth Speaker – $199

Don’t mistake “small” for “weak.” This little speaker certainly proves otherwise! At a mere 2.3 x 7.1 x 2 inches, it’s incredibly portable, yet delivers the rich, high-quality audio that Bose is famous for. It also packs up to seven hours of battery life, making it perfect for moving around the house or popping in your bad for impromptu dance parties wherever you may be.


apple-ipad-mini-smart-case-cover

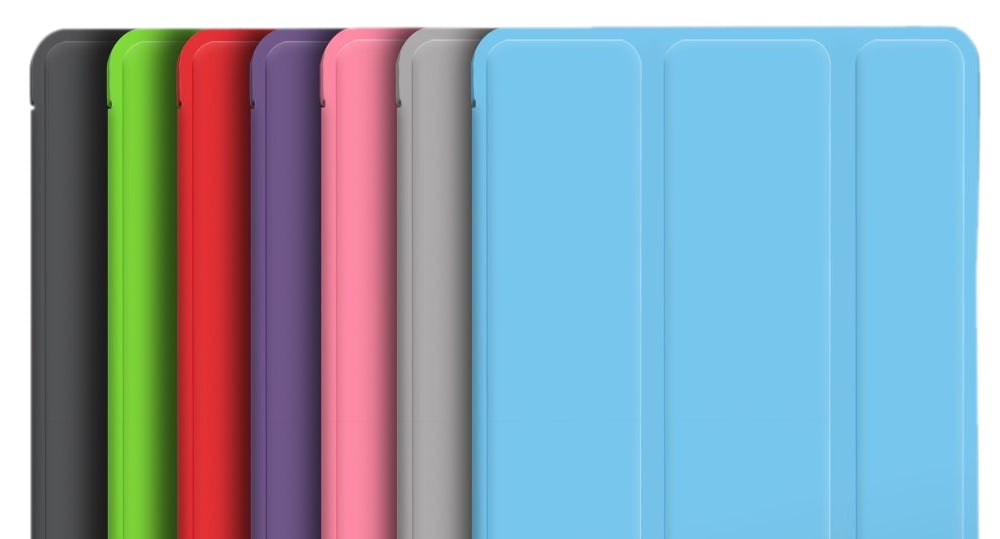
iPad Mini Retina Smart Case – $79 and Cover $39

The greatest feature of the iPad Mini has to be its size. Large enough to read and type on with ease, yet small enough to fit in a handbag, it’s both extremely useful and popular. And because it is, by nature, so sleek, it would be a shame to add unnecessary bulk in the form of a chunky case. The smart case is thin and attaches to the front of the Mini with a magnetic hinge, offering sleek screen protection. In addition, the case has a leather outer shell with micro fibre lining that keeps the front and back safe.

How to setup parental controls in OS X

Any parent should be concerned with how to put Parental Controls on their Mac device. Whether on a shared desktop computer or the child’s own laptop, setting up Parental Controls is always a pressing need. Luckily for you, Apple has made it quite easy to set up Parental Controls and apply them to specific accounts easily. To learn how, just follow the simple guide below:

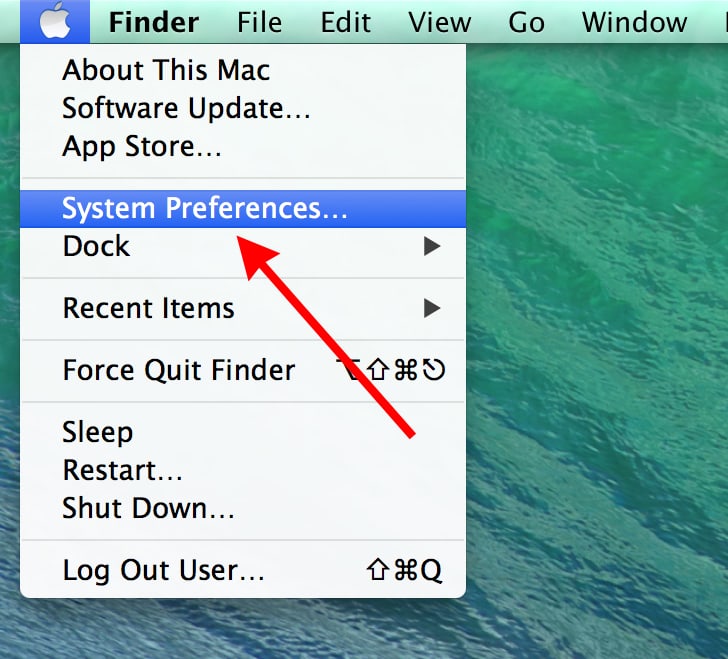
1. Click on the Apple menu and select System Preferences
mac-parental-controls-1
Step 1 of Mac Parental Controls
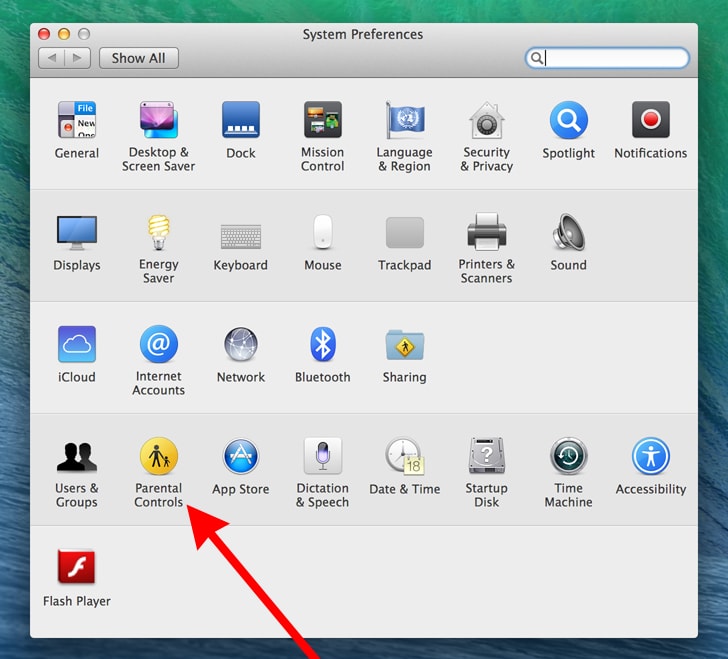
2. Select Parental Controls
mac-parental-controls-2
Step 2 of Mac Parental Controls
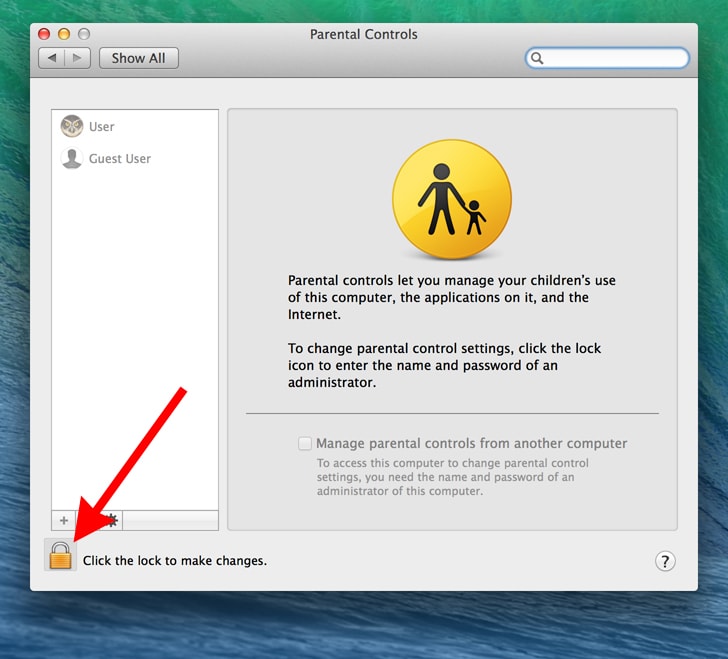
3. Click on the lock to make changes
mac-parental-controls-3
Step 3 of Mac Parental Controls
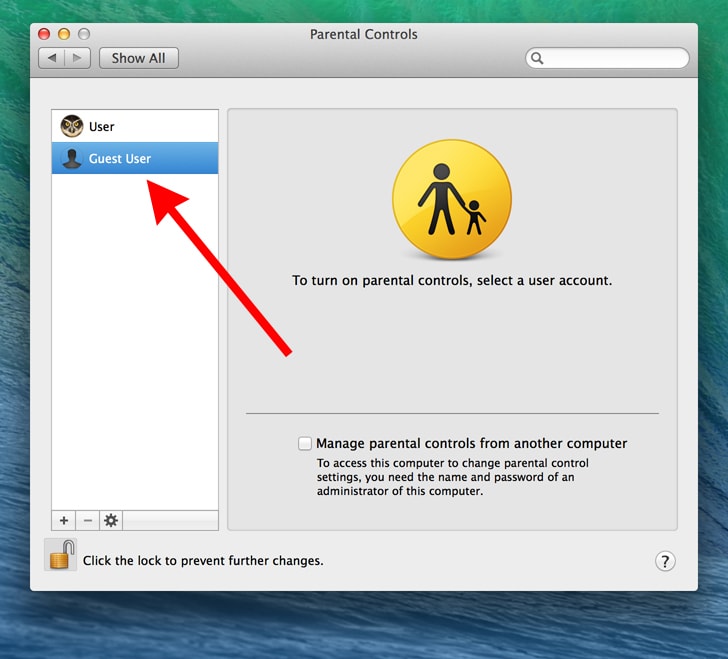
4. Enter your administrator password
5. Select the account, to which you would like to add parental controls
mac-parental-controls-4
Steps 4 & 5 of Mac Parental Controls
6. Navigate between the tabs (Apps, Web, People, Time Limits & Other) located at the top to change parental control specifics
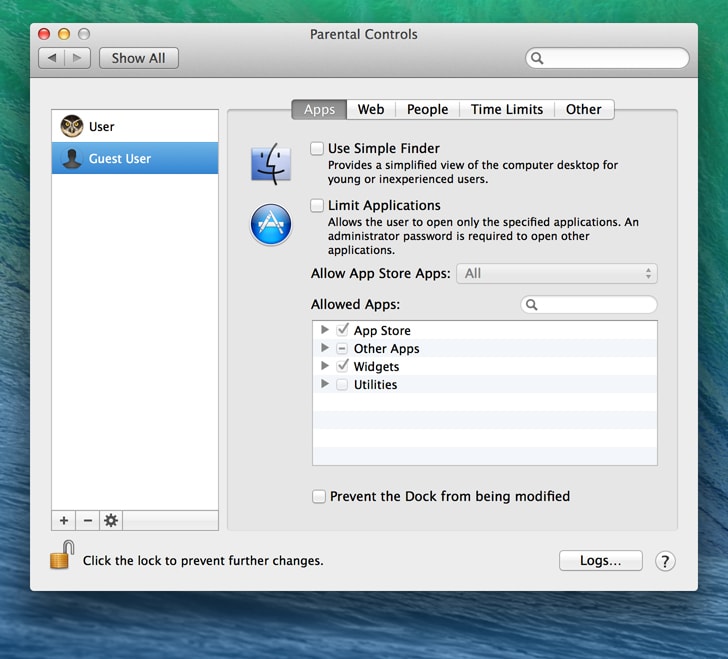
7. Apps Tab

You can change three settings in the Apps Tab. First, if your child is very young you may want to chose to use the simple finder, this will make the computer desktop easier to use but for most children this is not needed. Second you can limit applications, one of the core features to parental controls. Simply check the limit applications box and select which applications you want to prevent your child from using. Lastly you can prevent the dock from being modified (recommended).

mac-parental-controls-5
Steps 6 & 7 of Mac Parental Controls
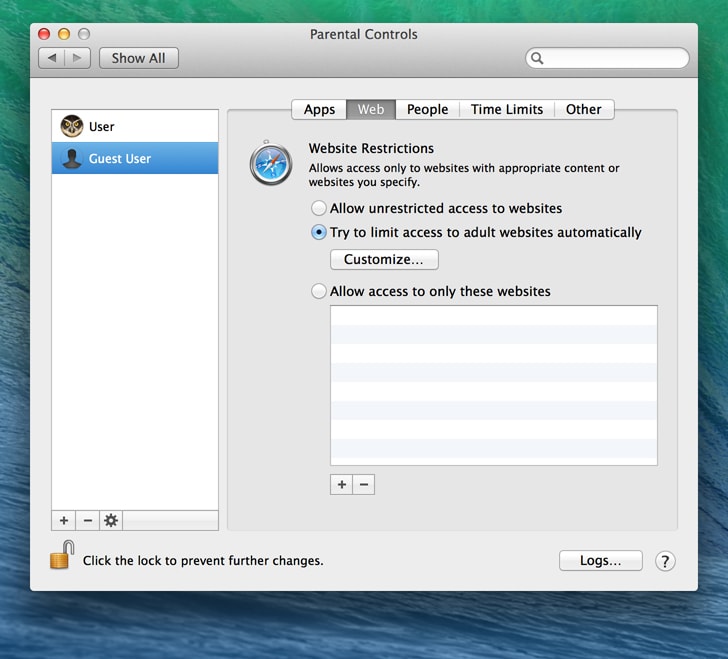
8. Web Tab

This is the most visited tab by parents. You have three options but the most popular are to either limit adult sites only or to allow access to websites you specify. Additionally you can click the logs button and view a history of the websites visited by the user.

mac-parental-controls-6
Step 8 of Mac Parental Controls
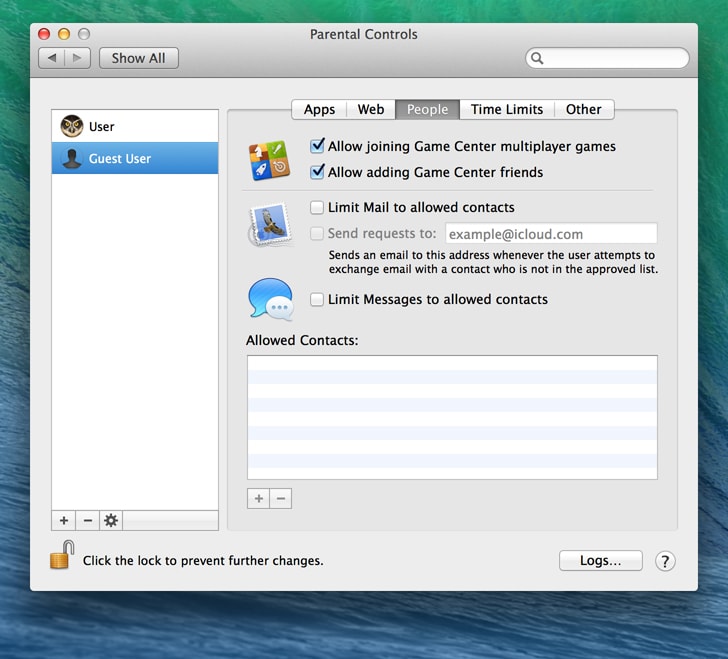
9. People Tab

With the People Tab you are allowed to set limits for games, email and messaging through iChat.

mac-parental-controls-7
Step 9 of Mac Parental Controls
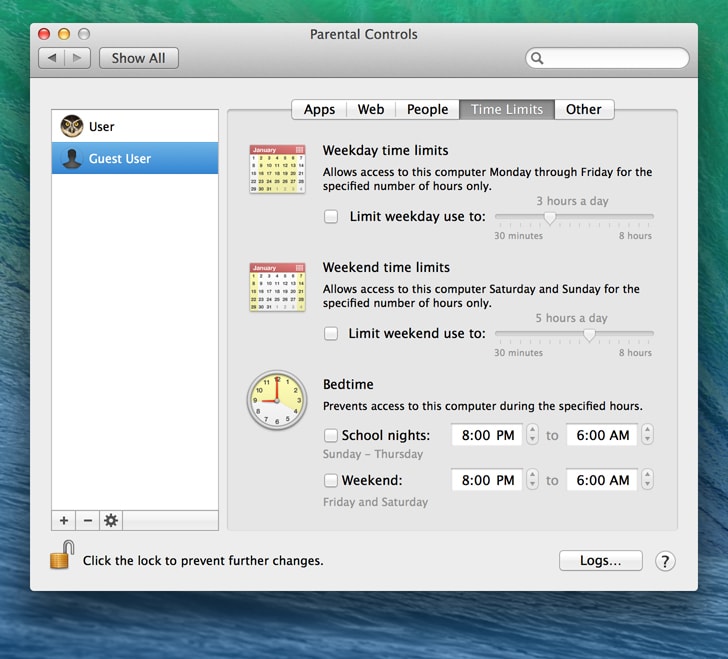
10. Time Limits Tab

This is an important tab that is underutilized by parents. The Time Limits Tab allows parents to select specific times a user is allowed to gain access to the computer. If you don’t want to be so selective, simply put limits on how many hours daily you would want your child to be on the computer. The tab has both weekday and weekend settings. It’s a great way to limit usage and push your children to be more active and social.

mac-parental-controls-8
Step 10 of Mac Parental Controls
11. Other  Tab

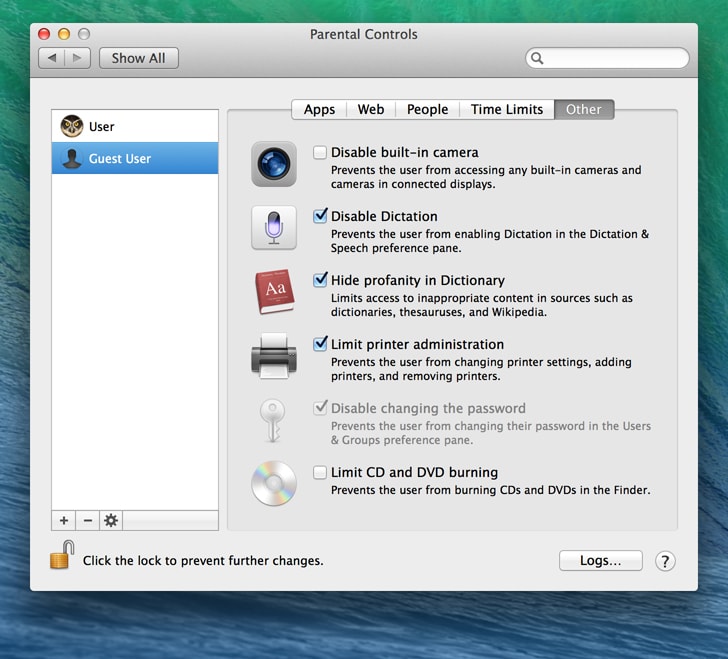
Anything that didn’t fit into the other tabs got thrown into the Other Tab. Here you can control access to the built-in camera, dictation, dictionary, printer administration (recommended), password changes (recommended) and finally cd/dvd burning.

mac-parental-controls-9
Step 11 of Mac Parental Controls

Setting up Parental Controls is easy and can be completed in a just a few minutes. Most parents spend most of their time adjusting limits in both the Web and People Tabs, adjusting website access and blocking the ability to chat with strangers. Apple has some additional parental control resources in their knowledge base.

Tip: When you’re finished don’t forget to click the lock to prevent further changes.

Tip: Clicking the logs button at the bottom of each tab will give you access to the user’s websites visited, websites blocked but attempted to access, applications used and chat messages.

Top 5 holiday gifts for Apple lovers under $50

It’s that time of year again when parents and friends search far and wide for the best holiday gifts. When you have an Apple fan on your list things can be difficult especially if you’re a PC person. Yuck! Don’t worry we won’t hold it against you. So here you have it, the best Apple gifts you can find all in one place and the best part is you won’t have to break the bank.

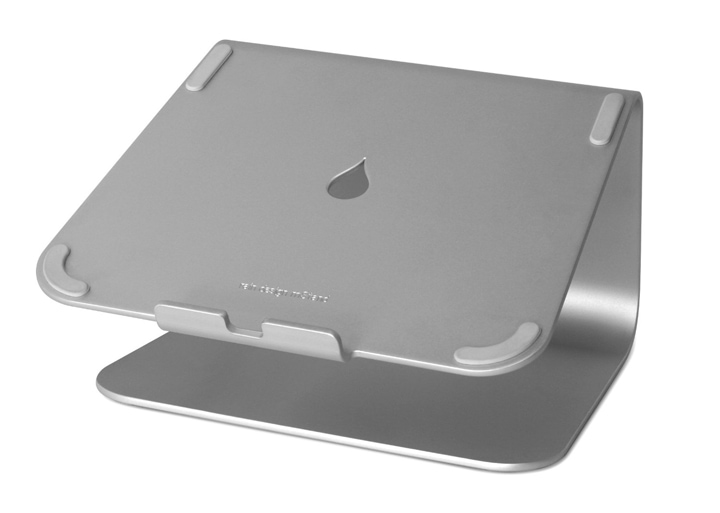
1. mStand Laptop Stand

rain-design-mstand-laptop-stand

The most popular laptop stand for Macs hands down. Works perfecting with the Apple MacBook Air and MacBook Pro. Also compatible with the older 17″ MacBook models. Great gift for under $50.


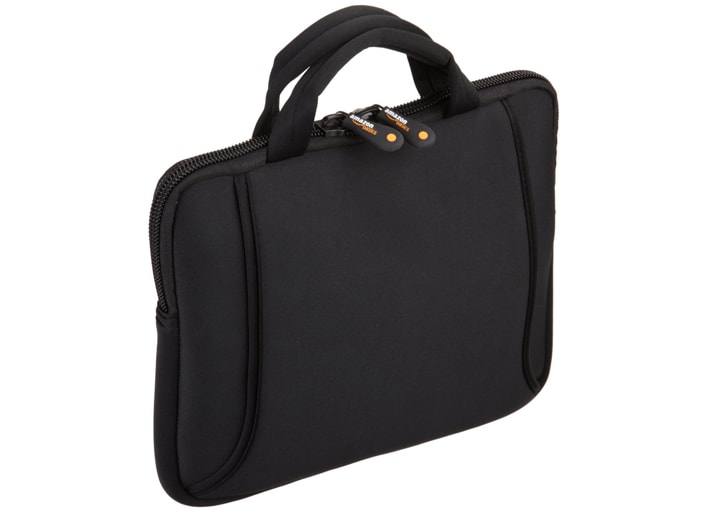
2. AmazonBasics iPad Air and Netbook Bag with Handle

amazon-basics-ipad-case

If you are looking for one of the best gifts for that iPad fanatic in your family, look no further. At under $10 it’s a no brainer. Fits any tablet from 7″ to 10″ and protects their most valuable asset.


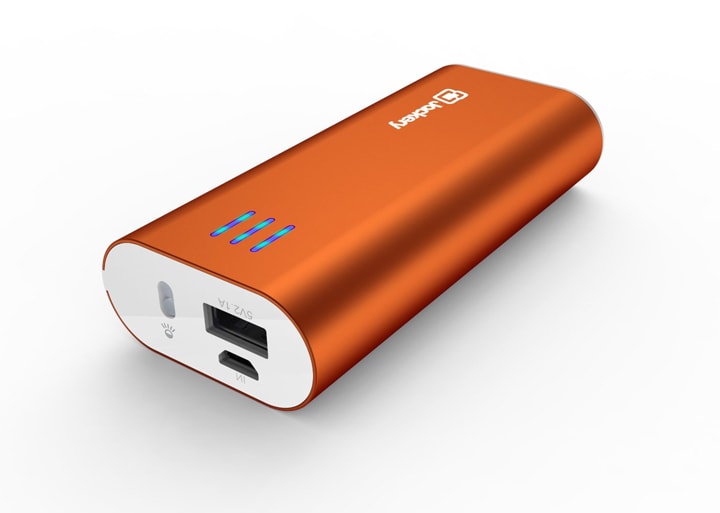
3. Jackery Bar Portable Power Pack

jackery-bar-portable-power-bank-pack

Perfect for the business or family member always on the go. Power all your favorite Apple devices when traveling or in an emergency. A must have for those most important to you. Also includes a built-in flashlight all for the great price of $30.


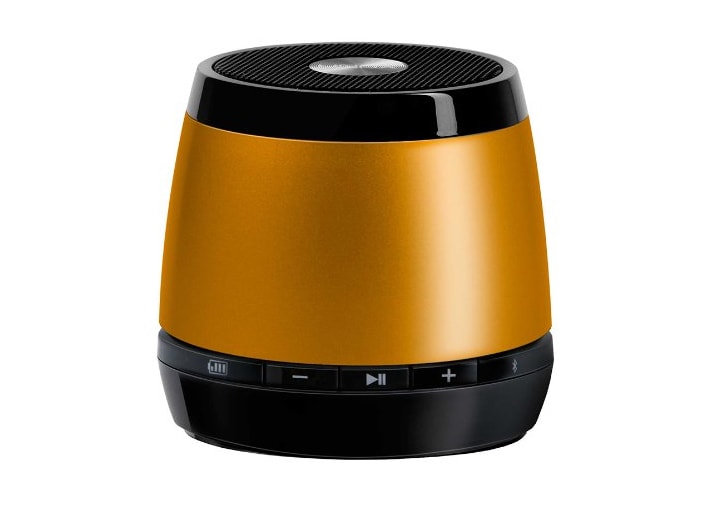
4. HMDX Audio JAM Classic Bluetooth Wireless Speaker

hmdx-jam-classic-bluetooth-wireless-speaker

Improve the sound quality of your Apple device with this bluetooth enabled speaker. Compatible with the iPad, iPhone and most Macs. Don’t let the size fool you, the sound is amazing and lasts for up to 4 hours with the included lithium battery. On sale now for $30.


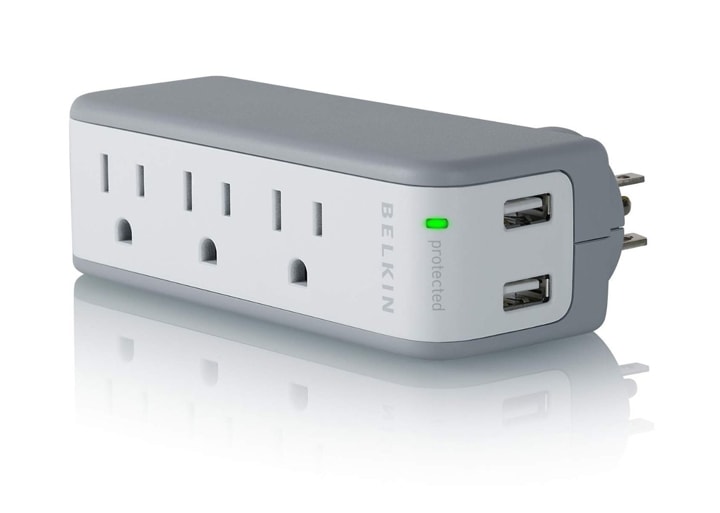
5. Belkin Mini Travel Swivel Charger Surge Protector with Dual USB Ports

belkin-surge-protector-with-usb-ports

Another item for people on the go. This surge protector is small enough to travel in any laptop bag and has 3 outlets plus 2 usb ports. Quickly charge your laptop, phones and other accessories quickly. A steal at around $10.

Is the retina display worth the extra cost?

If you’re in the market for a MacBook, you’ve got a lot of choices to consider, and a big one is whether or not it’s worthwhile to buy your new computer with retina display. The cost of doing so is higher, of course, but are the improved features worth the price?

The choice of whether or not to go for the retina display likely depends on a few factors. First, if you intend to work on graphic design, video or photo editing projects, you’ll appreciate the significantly improved picture quality. Second, if you have the extra money to spend and want the latest technology, then you may be inclined to go for the model with the new screen.

At present, a 13-inch MacBook Pro without retina display costs between $1199.00 and $1499.00 through the Apple Store, while the comparable model with retina display will set you back $1499.00 to $1699.00. The standard 15-inch model is $1799.00, while the price of the 15-inch MacBook Pro with retina display is a fair bit higher, priced between $2199.00 and $2799.00.

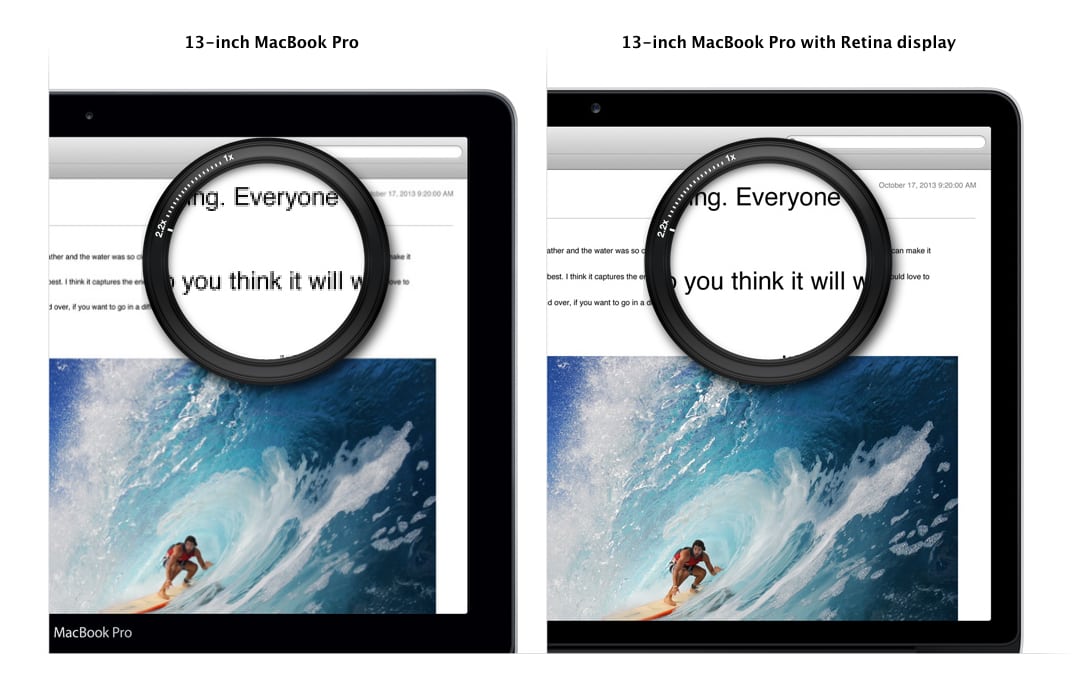
Retina Display Comparison
13-Inch MacBook Pro Retina Display Comparison

Some people don’t feel the extra expense is worthwhile for those who primarily use their Mac for tasks such as word processing, checking email and surfing the Internet. Others point out that the first generation of Macs with retina display have some drawbacks, and it may be wiser to wait for the next iteration with the bugs eliminated. However, plenty of early adopters are jumping on board, with many insisting that retina display makes user experiences for basic computing better and even text appear sharper.

The primary argument, besides price, for not purchasing a MacBook Pro with retina display is that some consumers with it have experienced various significant stability issues. Display defects, mainly with models that use the LG display as opposed to Samsung, have been reported. Other problems include graphics hiccups and troubles with battery life. Apple has now recognized the issues and is working with customers to address and rectify them.

Stability concerns aside, however, there is no denying the retina display looks stunning. The MacBook Pro with retina display features a tremendous 4 million pixels on the 13-inch model and 5 million on the 15-inch model. The retina display is also significantly brighter and glossier, boasting 263 lux and improved color saturation.

There are other advantages to choosing between the two types of MacBook Pro as well, including advanced all-flash architecture, more powerful Intel processors and additional RAM. Furthermore, more apps are being developed specifically to take advantage of Apple devices with retina display.

Whichever you choose, buying a new Mac is a significant investment. Start by identifying your specific needs and budget, and then access the many online resources that will allow you to read reviews and compare different models. Finally, it never hurts to pay a visit to the nearest Apple Store, even if you intend to purchase your computer online. Doing so will allow you to compare the standard and retina displays in person and make an informed decision.

While the standard Mac screen quality is still excellent, there’s no denying that retina display is the way of the future. At this time, sound arguments can be made for choosing either. Your best option is simply to do your research and pick what suits you best.

Top three most essential MacBook accessories

If you’re like many of us who love technology, you may have no sooner purchased your new MacBook computer before you found yourself wondering what other gadgets you could use in conjunction with it. Some people simply don’t have the need for MacBook accessories, while others like to add on everything they can for a full computing experience. Furthermore, many other people simply choose a few key peripheral devices they require for security, functionality or work.

External Hard Drive

One of the most essential devices every MacBook owner should have is an external hard drive. While the hard disk, solid-state and fusion drives that come in the latest MacBook models are renowned for being secure and stable, it is always a wise idea to back up your data on a regular basis. Thanks to Apple’s Time Machine, doing so with an external hard drive is extremely easy. Should you ever experience an unfortunate hiccup with your computer, you’ll feel better knowing that copies of all your important files are safely backed up on a drive that is separate from your computer.

DVD/CD Combo Drive

Another major accessory is an external DVD/CD combo drive, particularly one that can both read and write discs. Primarily useful for those who have a MacBook, it means that software like a previous edition of iWork or Office for Mac doesn’t have to be re-purchased on the Mac App Store to accommodate no longer having an optical drive. Another bonus of purchasing such a drive is that new models have the ability to read and write Blu-Ray discs. That makes them a great purchase for those who own MacBook Air laptops as well as those with Macs that just aren’t Blu-Ray capable.

Magic Mouse

A third essential peripheral device is an Apple Magic Mouse. For those who are still using a hardwired mouse, particularly one made by a third-party brand, the Magic Mouse may take some getting used to. But once you’re accustomed to it, it will revolutionize your computing experience. The Magic Mouse is made to get the most out of Apple computers, whether you’re navigating the iTunes store or just maneuvering through your own files. Whether it comes with your iMac or you’ve bought one to use in place of the Trackpad on your MacBook, the Magic Mouse is a great peripheral device for any Apple user.

While these may be three of the most essential accessories, and basic, peripheral devices for Macintosh owners, there are countless other popular ones as well. MacBook owners who work with numbers often like to add on a number pad that makes calculations easier to input. And those who use their MacBook for heavy-duty gaming often go for specialized game pads, joysticks and other peripheral devices that enhance play.

If you’re a MacBook owner who relies heavily on peripheral devices, then the new Apple products with Thunderbolt and Thunderbolt 2 are ideal. With the ability to daisy-chain up to six different peripherals, Thunderbolt provides fast, seamless uploading and connection without slowing your computer down. As essential as your accessories may be, owning a Thunderbolt-capable MacBook is just as necessary for optimal use of your gadgets of choice.