Any parent should be concerned with how to put Parental Controls on their Mac device. Whether on a shared desktop computer or the child’s own laptop, setting up Parental Controls is always a pressing need. Luckily for you, Apple has made it quite easy to set up Parental Controls and apply them to specific accounts easily. To learn how, just follow the simple guide below:
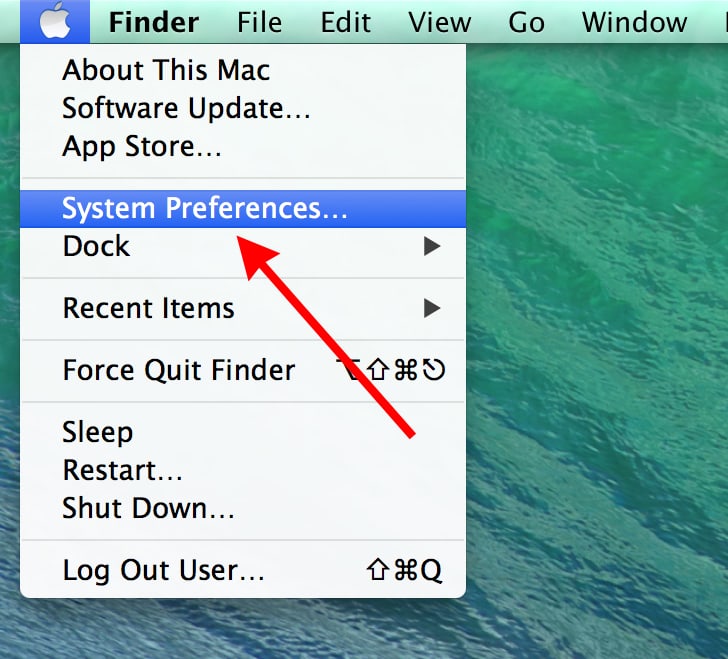
1. Click on the Apple menu and select System Preferences
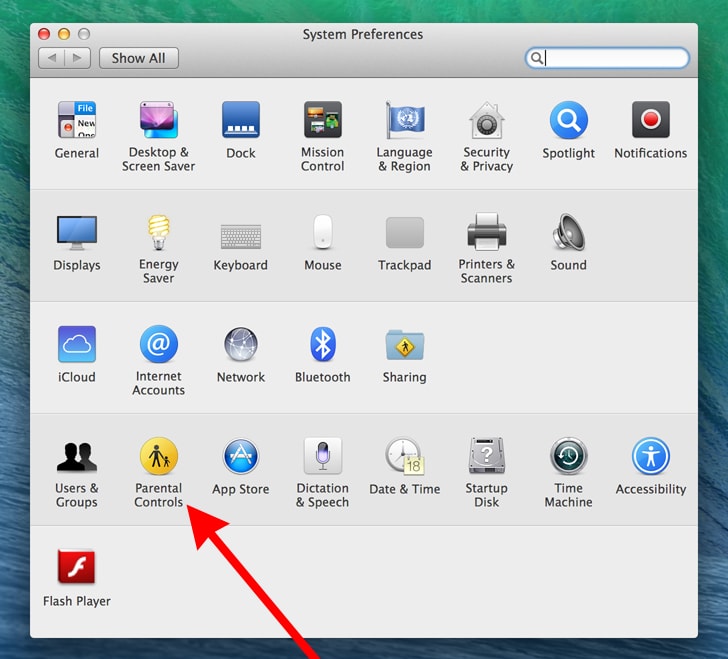
2. Select Parental Controls
3. Click on the lock to make changes
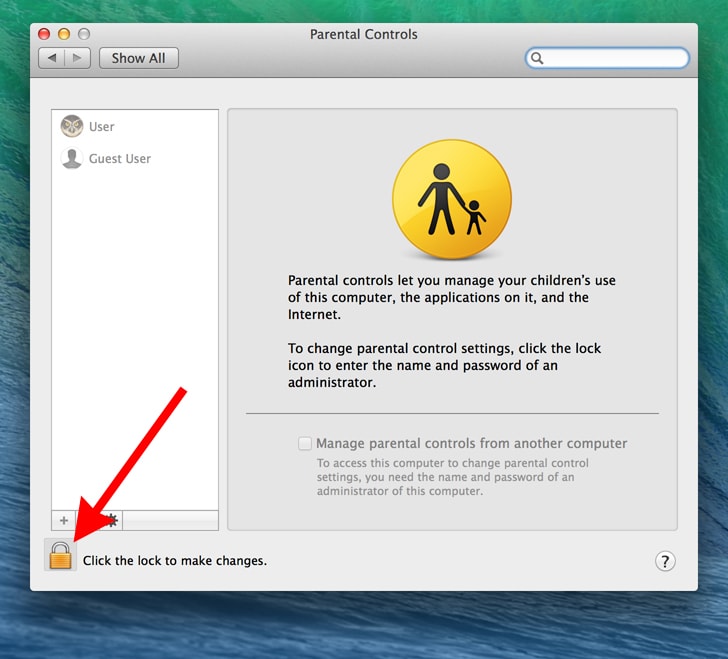
4. Enter your administrator password
5. Select the account, to which you would like to add parental controls
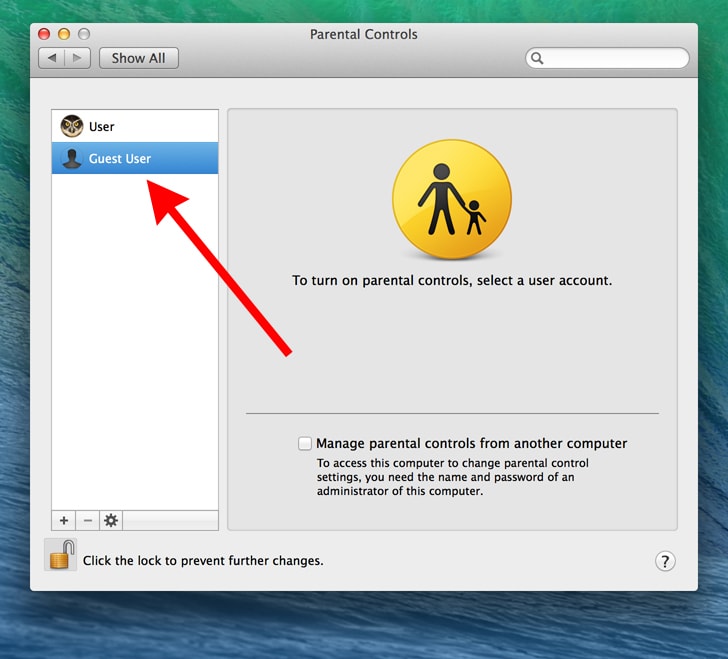
6. Navigate between the tabs (Apps, Web, People, Time Limits & Other) located at the top to change parental control specifics
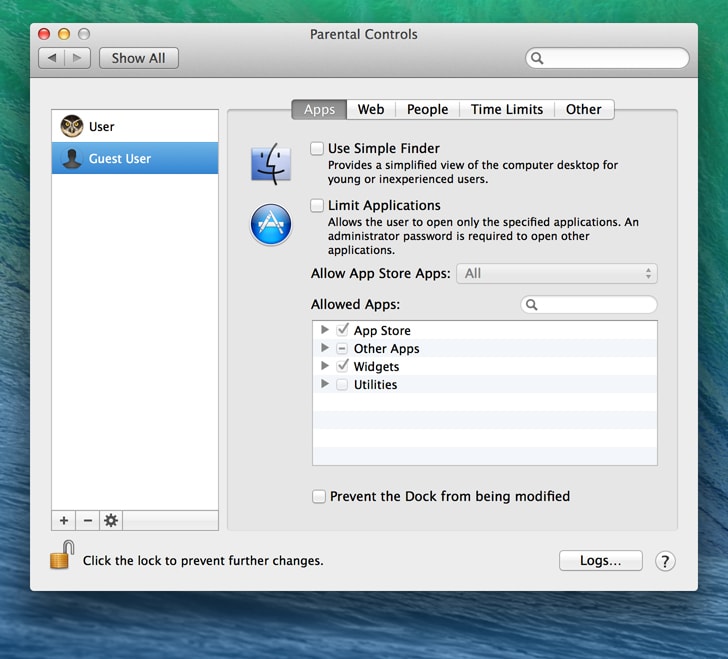
7. Apps Tab
You can change three settings in the Apps Tab. First, if your child is very young you may want to chose to use the simple finder, this will make the computer desktop easier to use but for most children this is not needed. Second you can limit applications, one of the core features to parental controls. Simply check the limit applications box and select which applications you want to prevent your child from using. Lastly you can prevent the dock from being modified (recommended).
8. Web Tab
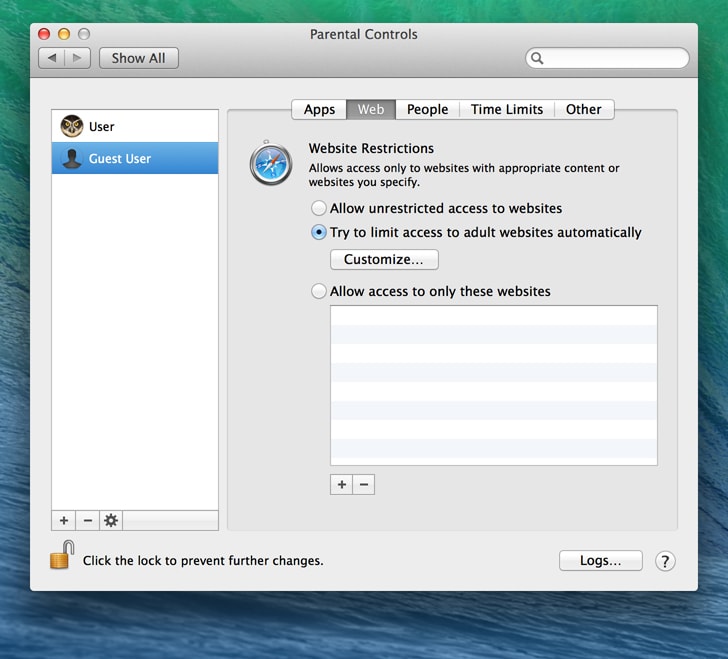
This is the most visited tab by parents. You have three options but the most popular are to either limit adult sites only or to allow access to websites you specify. Additionally you can click the logs button and view a history of the websites visited by the user.
9. People Tab
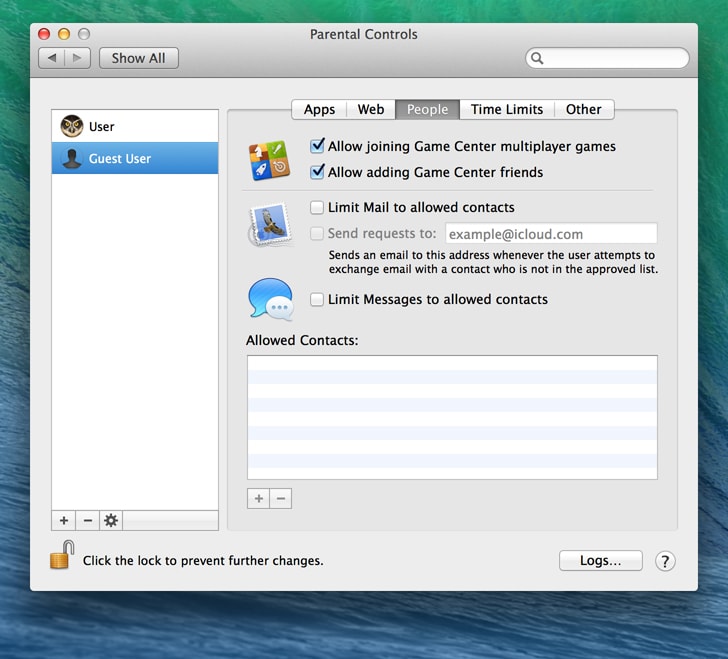
With the People Tab you are allowed to set limits for games, email and messaging through iChat.
10. Time Limits Tab
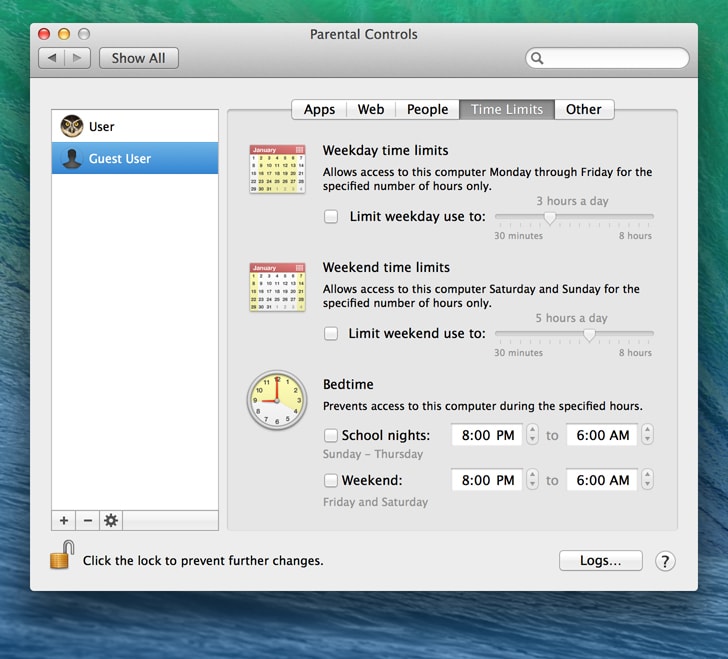
This is an important tab that is underutilized by parents. The Time Limits Tab allows parents to select specific times a user is allowed to gain access to the computer. If you don’t want to be so selective, simply put limits on how many hours daily you would want your child to be on the computer. The tab has both weekday and weekend settings. It’s a great way to limit usage and push your children to be more active and social.
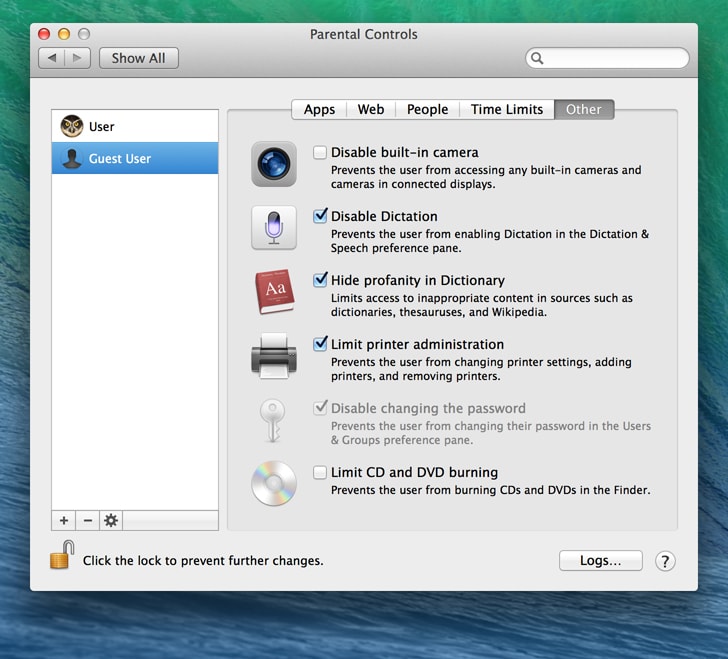
11. Other Tab
Anything that didn’t fit into the other tabs got thrown into the Other Tab. Here you can control access to the built-in camera, dictation, dictionary, printer administration (recommended), password changes (recommended) and finally cd/dvd burning.
Setting up Parental Controls is easy and can be completed in a just a few minutes. Most parents spend most of their time adjusting limits in both the Web and People Tabs, adjusting website access and blocking the ability to chat with strangers. Apple has some additional parental control resources in their knowledge base.
Tip: When you’re finished don’t forget to click the lock to prevent further changes.
Tip: Clicking the logs button at the bottom of each tab will give you access to the user’s websites visited, websites blocked but attempted to access, applications used and chat messages.


