Category Archives: How-To

How to use your Mac to make and receive phone calls or texts

With the release of Mac OS X Yosemite and iOS 8 Apple introduced several new features that make cross-platform communication easier and more seamless than ever. Two of those features – SMS/MMS and Call Relay – allow you to make and receive calls through the FaceTime app as well as to send and receive text messages though the Messages app. In this article we’ll show you how to enable this functionality.

What you’ll need:

  • A Mac running OS X Yosemite that’s connected to Wi-Fi
  • An iPhone running iOS 8.1 or later connected to the same Wi-Fi network that has the ability to make calls and send text messages
  • Both devices have to use the same Apple ID for iMessage/FaceTime

Note: It is important to understand that making calls and sending texts from your Mac is not free. All of the data still goes through your phone, you’re just interacting with it on your computer. So your carrier will charge you for the calls and texts as if they made through your iPhone.

Tip: Unlike Handoff, Call Relay and SMS Relay do not require Bluetooth LE communication between your Mac and iPhone in order to work, so this feature is available to all devices that run the required operating systems.

iphone-cellular-calls
Setting Up Call Relay

How to set up Call Relay:

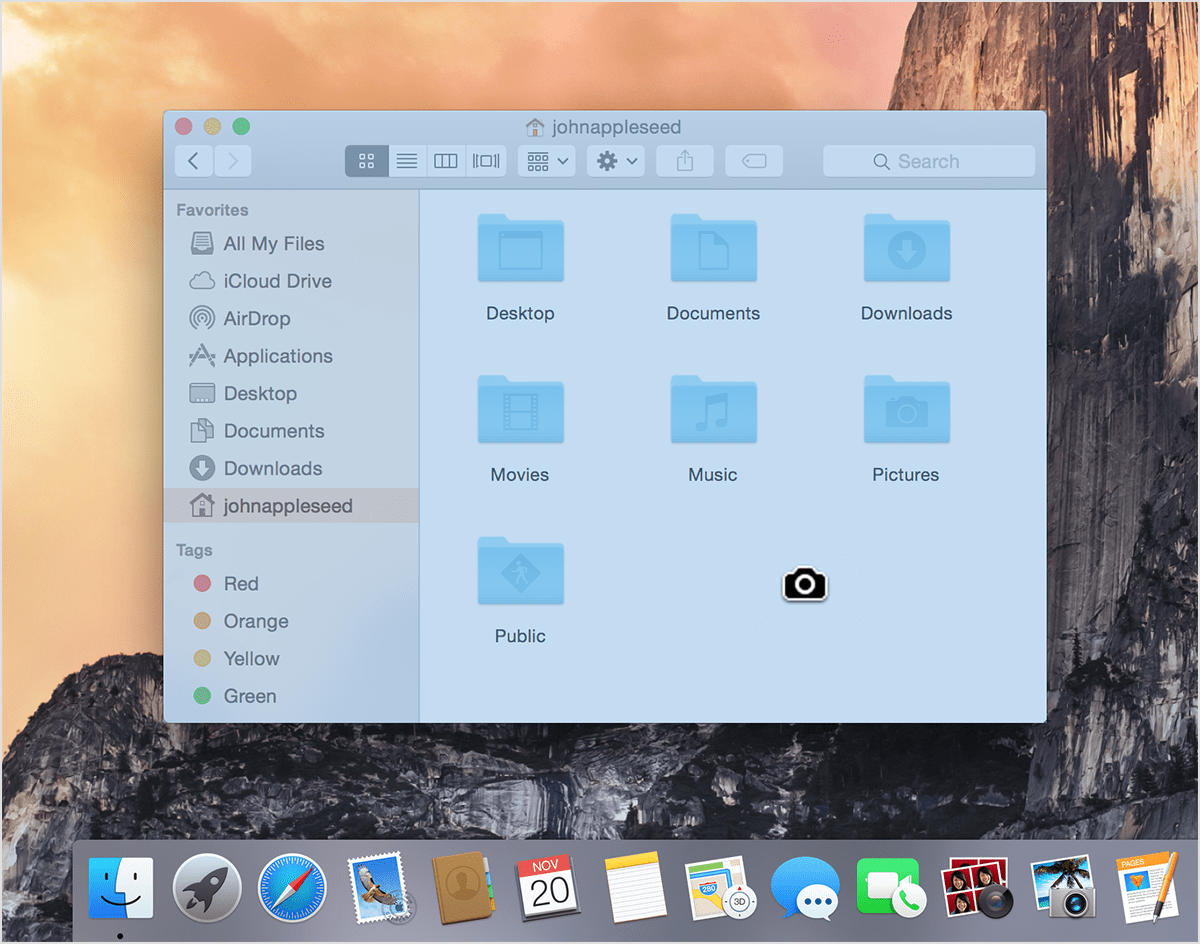
  1. On your Mac, open FaceTime from Launchpad, your dock or Spotlight.
  2. Click on FaceTime in the menu bar.
  3. Click on Preferences.
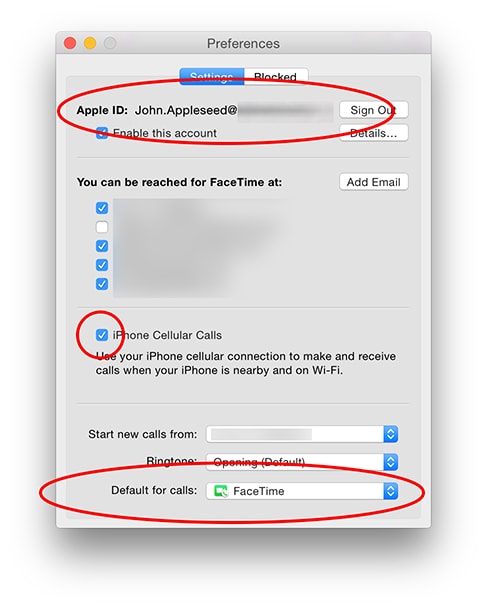
  4. Ensure that the option “iPhone Cellular Calls” has a checkmark in front of it.
    Tip: At the end of the option’s description you can see the phone number that will be used to place and receive calls.
  5. On your iPhone, go into the Settings app.
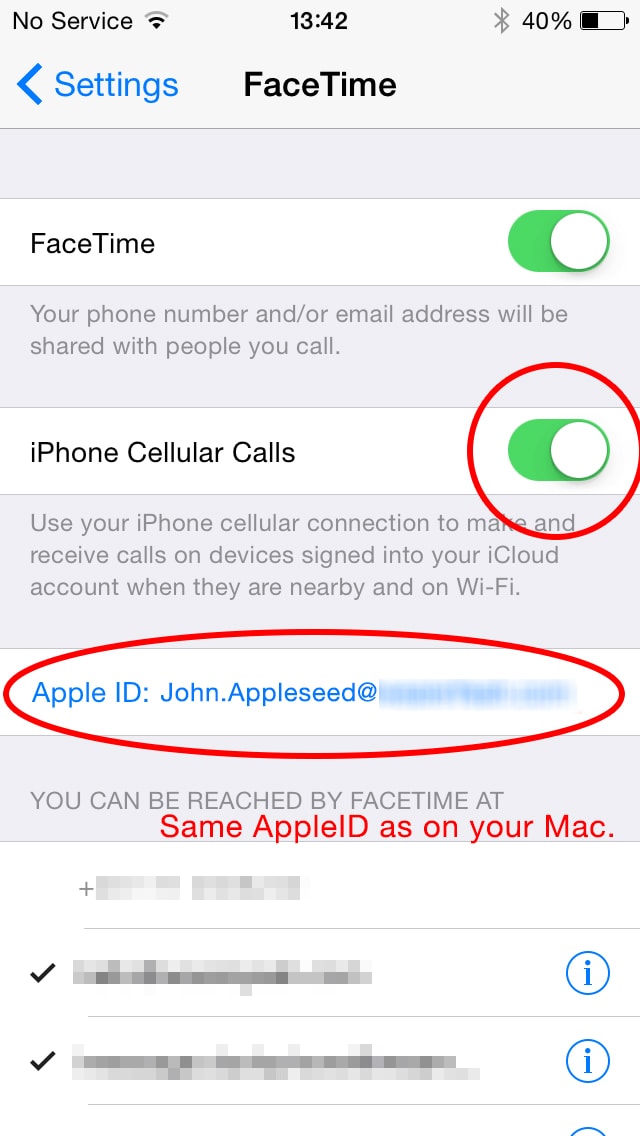
  6. Open the FaceTime section.
  7. Ensure that the option “iPhone Cellular Calls” is turned on
same-apple-id-as-on-mac
Use your same ID as used on your Mac

How to make and receive calls:

If you’ve ever received a FaceTime Audio call on your Mac, you already know how to receive regular phone calls since they appear in exactly the same manner. The great thing is that you don’t need to keep FaceTime open in order to receive FaceTime and cellular phone calls.

Making a phone call is more tricky. In apps like Mail, Contacts, Maps, Calendar, Safari, etc you need to hover over a phone number with your mouse until a blue phone icon appears. Clicking on it will initiate a call. The biggest drawback is that there isn’t an integrated keypad, so you can’t dial random phone numbers. Fortunately, Mac App Store apps like Keypad can add this functionality.

text-message-forwarding-iphone-setup
Text Message Forwarding

How to set up SMS/MMS Relay:

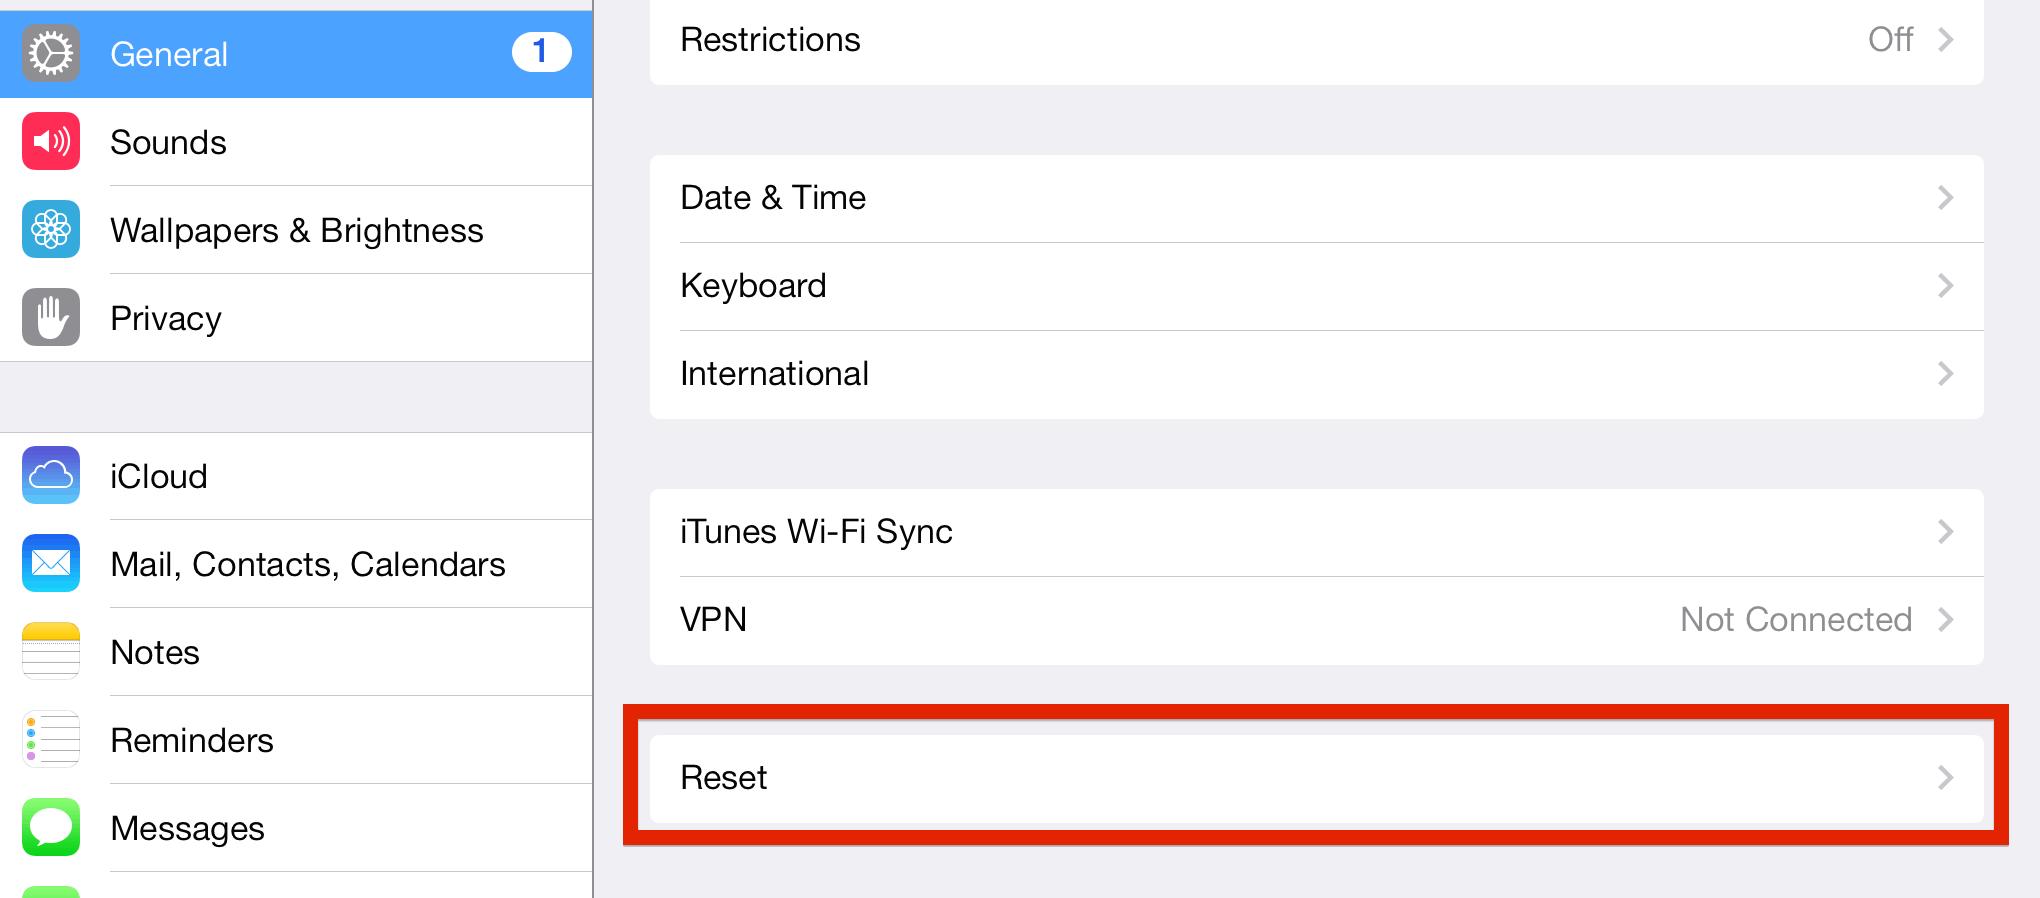
  1. On your iPhone, go to Settings.
  2. Choose the Messages section.
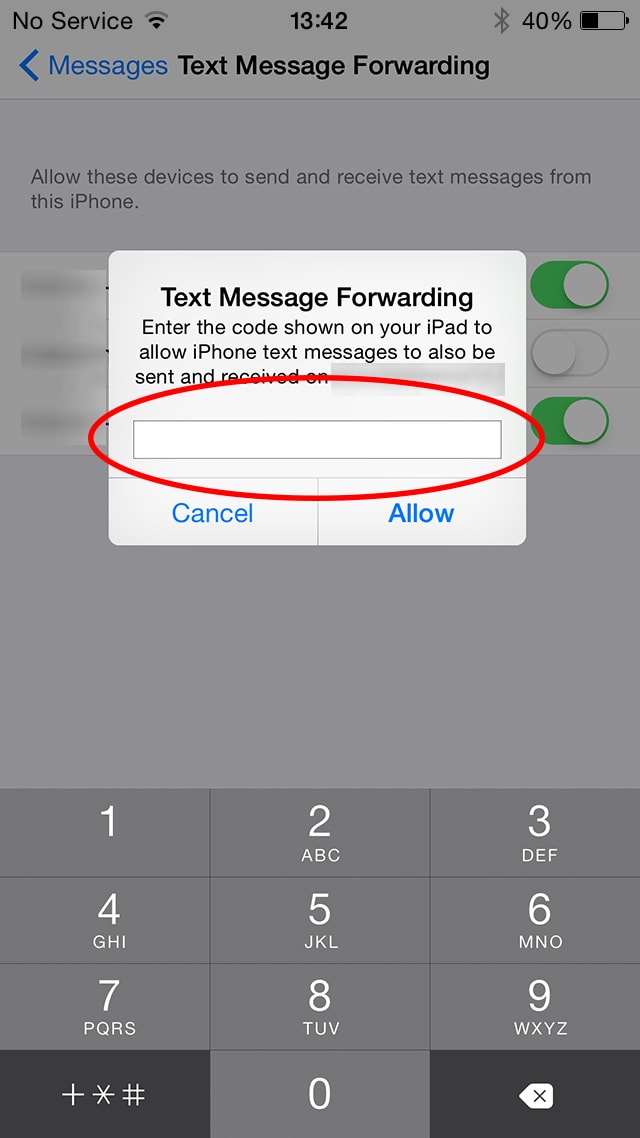
  3. Enter the Text Message Forwarding menu.
  4. Enable the toggle next to your Mac’s name.
  5. On your Mac you should receive a popup with a numeric code that you need to enter on your iPhone in order to complete the setup.

Tip: If you’re not receiving your numeric code on your computer, log out of iMessage on your phone and Mac and then log back in. If that doesn’t work, try adding a new email address where you can receive iMessages and follow the steps again.

How to send and receive texts on your Mac:

Sending and receiving texts is identical to sending and receiving iMessages. Everything is done through the Messages app. If you need to text a number that’s not in your Contacts, just enter it as the recipient of a new message, type in the text and send it.

How to perform a clean install of Mac OS X using Internet Recovery

Clean install of Mac OS X to Speed up your Mac. If your Mac feels sluggish and experiences random crashes and glitches, it may be worth wiping your disk and starting over with a fresh install of Mac OS X Yosemite.

This will be especially beneficial if you haven’t done so in recent years.  Most people opt instead to upgrade their setup to the next version of Apple’s desktop operating system through the Mac App Store. This can slow down your mac.  While upgrades preserve your personal files and media, they also preserve other data and settings which negatively impact the performance, battery life and stability of your Mac.

In this guide we will use Internet Recovery to install a fresh copy of OS X on your computer. Check out our guide on how to make an OS X recovery USB drive if you’d like to recover OS X using a flash drive instead.

Performing a Clean Install via Internet Recovery:

Pros:

  • Straightforward
  • Doesn’t require additional hardware

Cons:

  • Requires a valid Apple ID
  • Requires a Wi-Fi connection, preferably a fast one

command-r-mac


Let’s start:
  1. Start up your Mac.
  2. While you’re hearing the boot-up sound, press and hold the Command key and the “R” key on your keyboard. Continue holding the two keys until you see Apple’s Recovery setup.
  3. You’ll be greeted by the OS X Utilities screen. Choose Disk Utility.
  4. Select your hard drive from the list on the left and click on the Erase tab.
  5. Enter a new name for your hard drive and format it as Mac OS Extended (Journaled). Press the Erase button to wipe the drive.
  6. Close Disk Utility and proceed to install Yosemite.
  7. Choose the newly formatted disk, enter your Apple ID and password when prompted and wait for the installation to complete.

Since Internet Recovery downloads the full 4GB Yosemite installer right then and there, expect the process to take an additional hour or so, depending on your network speed and the load on Apple’s servers.

How to fix no sound on iPad problems

One of the most common issues with the iPad is the inability to hear any sound. Obviously this can affect the overall entertainment you’ll get from the device. Lucking if you here no sound on the iPad there are numerous things you can try to fix the issue before seeking help from Apple.

no-sound-on-ipad-side-switch
Apple iPad Side Switch in Mute Position

 1. Check to see if the iPad is actually muted or not

Look on the side of your device for a small switch. This is actually called the “Side Switch.” If any orange color is showing then your iPad is being muted. Typically though this should only mute sounds such as notifications, alerts and sound effects. Move the switch up to the non-muted position just to be sure.

ipad-no-sound-volume-control
Apple iPad Control Center – Volume Control

If you still have no sound, try adjusting the mute option through the system:

– To bring up the Control Center, double tap the Home Button
– Scroll to the right, If the mute button is highlighted (Showing a bell icon with a line through it), tap it to unhighlight it and un-mute.

Note: For people using iOS 7 or higher, you can make a swiping motion upward on the Home Screen to bring up the Control Center.

sound-not-working-on-ipad
Apple iPad Control Center – Mute Button

 2. Try the obvious, Turn up the volume

You’d be surprised at the amount of people that don’t even try this. If your iPad has no sound, you adjust this using the Control Center or the manual Volume Control on the side of the iPad.

3. Reboot, but first end all applications to be safe

– Double tap on the Home Button to bring up your currently running applications. Swipe up with your finger on each app to close.

– Now that all your apps are closed, hold down the power button and home button at the same time. If it prompts you to swipe in order to turn off your iPad simply follow the directions.

– Now that your iPad is turned off, turn it back on using the power button.

ipad-sound-not-working
iPad Settings – General – Reset

 4. Still no sound, Restore the iPad to factory settings

Warning: This will erase all the information on your iPad.

– First, connect your iPad to your computer and make a back up in iTunes.

– After you make a backup, go to the Settings menu on your iPad.

– Click General, scroll down to Reset.

– Click on Reset and when prompted the click through the warning messages.

Note: It’s recommended that you have your iPad connected to a power source when it’s restoring the factory settings.

5. Ok, that didn’t work now what

Here are some quick and simple things to check before you call Apple, or set up an appointment with the genius bar, if the sound on your iPad is still not working.

– If you are having sound problems with a specific application, delete that app and reinstall. Contact the owner of the application if you continue to have issues.

– There is a chance the issue could be with your headphones. Check your headphones in other devices to make sure they are working properly.

Leave a comment and describe your problem, was it fixed or are you still having issues?

How to take a screenshot on Mac OS X

How do I take a screenshot, is one of the first, if not the most common question asked by users on desktop and mobile devices alike. Taking a screenshot on Mac OS X is very similar to taking a screenshot on pc operating systems, only you have some more creative options. Take a look below at our simple quick guide, if you just simply need a reminder of the commands or continue reading for more detailed instructions. These commands are easy to use but there are also screen capture programs available in the App Store for more advance techniques such as capturing video and multiple still images.

Screenshot Quick Guide:

Captures the entire screen:

Command-Shift-3

Use the crosshair pointer to select a specific area:

Command-Shift-4

Captures a specific window or menu:

Command-Shift-4, Space Bar, Click

Captures to a clipboard instead of the desktop:

Command-Shift-Control-4

How to Screenshot:

In order to quickly capture your entire screen at full resolution use the following sequence. Once complete it will save the screenshot to your desktop in PNG format:

command-shift-3
command-shift-3

To capture your entire screen but save directly to the clipboard use the following combination of keys below. Once it is your clipboard you will have to paste (Control-V) the screenshot into the program or document of your choice.

command-control-shift-3

To capture only a specific part of your screen use the following keys and drag the cursor over the area of your choice. Once you un-click the screenshot is saved to your desktop.

command-shift-4
command-shift-4

To capture a window or menu as a screenshot, use the following keys and then click once with your mouse over the window or menu of your choice.

command-shift-4-spacebar

Notice after you hit the spacebar a camera icon will appear over the window. Simply click once with your mouse and only that window is saved as a screenshot to your desktop.

how-to-screen-shot-mac
screen shot mac


How to rename your Magic Mouse in OS X

This question gets asked a lot: How do I rename my bluetooth Magic Mouse (and other bluetooth devices) in Mac OS X? It’s actually quite simple, just not immediately apparent. When you first set up your bluetooth device it will typically use your name as the identifier, for example: John Doe’s Magic Mouse. Some people for privacy reasons need to change this, others want to change the name just for fun.

Renaming your Bluetooth Devices

  1. Go to System Preferences, then Mouse
  2. In the lower right, click Set Up Bluetooth Mouse
  3. A list of your connected devices appears, right click the name of the device you’d like to change
  4. Click Rename and enter a new name of your choice, then click Rename again to finalize

Note: There are two other ways to get to these settings:

– Click on the Bluetooth Icon in the Menu Bar, then Open Bluetooth Preferences
– Click on System Preferences, then Bluetooth