Category Archives: How-To

How to Navigate your new Apple iPhone X with no home button


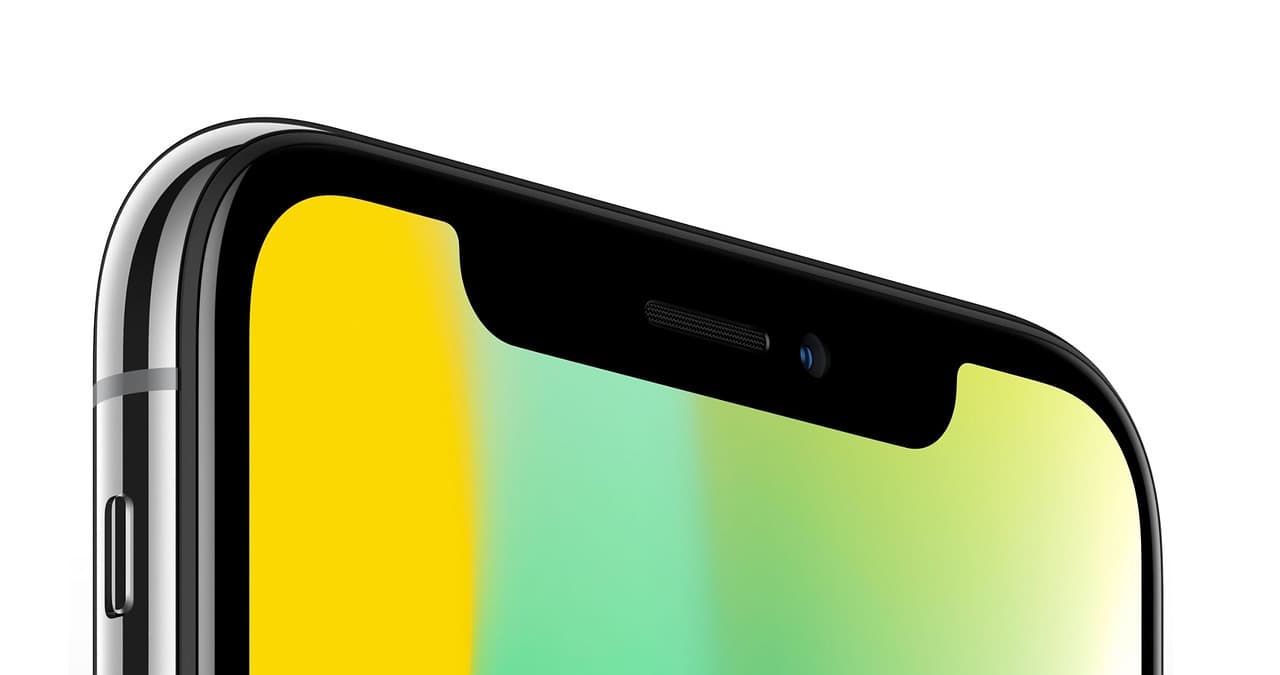
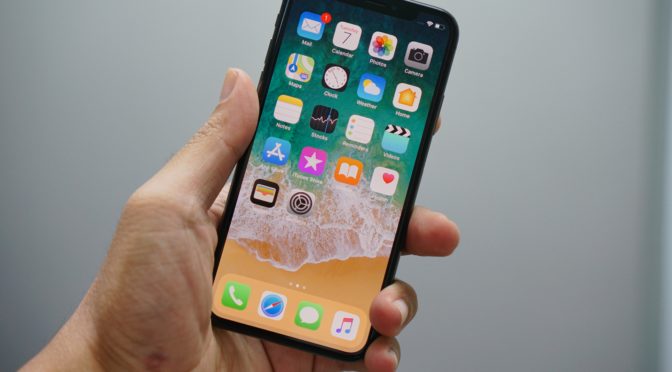
So I’m sure you’ve seen by now that unlike every previous iPhone ever created, we have been left without an official home button on the brand new Apple flagship smartphone, the iPhone X.  Understandably, you might have a few questions about some of the commands the old home button used to control, and HOW TO adapt to Apple’s new design.

How to Unlock Your New iPhone X

Obviously, there is no TouchID anymore with the absence of the official home button, but not to worry! FaceID looks quite promising (and speedy, too).


It works exactly how it sounds it works. Look at your iPhone X and (given you’ve set up your security preferences) your phone will unlock, with a swipe of the screen to finish the process.

Now that you’ve unlocked your phone, you might want to know how to bring up the home screen?

How to go to the Home Screen on Your New iPhone X

Swipe up from the bottom of the screen. It probably couldn’t be any easier than this (unless we still had a designated button).

What about the Control Centre?

It’s as simple as swiping DOWN from the TOP RIGHT hand side of your new iPhone X.

To bring up your notifications, it’s the exact same action, but from the TOP LEFT hand side of the screen. (Even the centre of the screen will do the same job)


How do I Switch Between Apps?

Okay, imagine that your new iPhone X still has a home button. To swipe right, swipe your finger/thumb from the bottom left corner of the phone and draw an imaginary semi-circle over where the home button used to be. The same goes for swiping left, but swap sides.

Where is Siri?

If you don’t want to do the regular call for Siri – “Hey Siri”, not to worry! Just press and hold the power button on the right side of your new iPhone X.

What about Apple Pay?

This one can take some getting used to.

Double clicking the power button on the right side will bring up your wallet. You will then need to use FaceID to make and complete a payment.

How do I Screenshot?

Super simple! Simultaneously long hold press both the power button and the UP volume button. It’s handy that these two buttons are parallel to each other.

And finally, what about Hard-Resetting my new iPhone X?

It’s a little tricky, and you might not get it your first time, but bare with me.

Really quickly, tap the volume UP button, followed by the volume DOWN button, then HOLD the power button down. You should eventually see your screen go black and the Apple logo appear.

I hope this guide helps you overcome and adapt to the changes that have been made. Nothing is ever too difficult to adapt to for us Apple faithful.

Click HERE for the latest prices on the iPhone X.

Right Click on Mac: A How to Guide for PC Users

Maybe you’ve been used to PC and you recently switch to Mac and are stuck confused as to how to right click on a Mac. It’s not so difficult if you know what to do and the functionality is still there. You’ve come to the right place if you’ve been scratching your head asking, “How do you right click on Mac?” We have got you covered in this guide.

right click on mac
Use Control + Mouse Click to Right Click

Press “control” + click = to Right Click on Mac

Simply press control and then click to enact the “right-click” function on a Mac. For some reason Apple did not ever want to have the right click as a separate button. Now you know how to right click on a Mac. Pretty simple!

If you feel like you really need the right click button on the mouse then you can buy the Apple mouse so you’re never stuck wondering, “how do i right click on a mac?” ever again.

The “Mighty Mouse” does not have a separate right click function but the right side of the mouse will know when you want to right click.

right clicking on mac
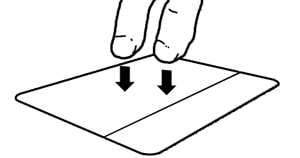
Double Tap to Right Click on Mac

Another way to Right Click on Mac:

MacBooks can right click by simple using two fingers when you click. Magic!

If it’s not working then you can open System Preferences and go to Keyboard and Mouse.

Then go to “Trackpad” and make sure the “Tap trackpad using two fingers for secondary click” box is checked and you’re ready to go!

Now you know how to right click on Mac and your worries are over. You’re the right clicking master and can have all the same functionality as a PC. Next time your friends asks you how to right click on a mac you’ll have an answer ready to go and you’ll see like the tech quiz. Now get out of here and get right clicking! There is work to be done.

How to Access iCloud E-Mail Login from your PC

If you’re an avid Mac user then you’re probably using iCloud email. However, you’re sticking with PC access you may wonder how to login to your iCloud.com mail. Not to fear, we can show you exactly how to get into your iCloud mail from a PC so you’re never stuck without e-mail access.

Rest assured, you can access your iCloud email anywhere that you have your iCloud email login. This means from an iPad, iPhone, Mac, or PC. All that you need a major web browser with full functionality and you’re set. Let’s go over the easy steps for getting your iCloud mail from anywhere.

How to Access iCloud Email

iCloud Email

Step 1 – Simply go to any web browser and go to http://icloud.com and then login with your normal iCloud email login AKA your Apple ID and password.

icloud mail

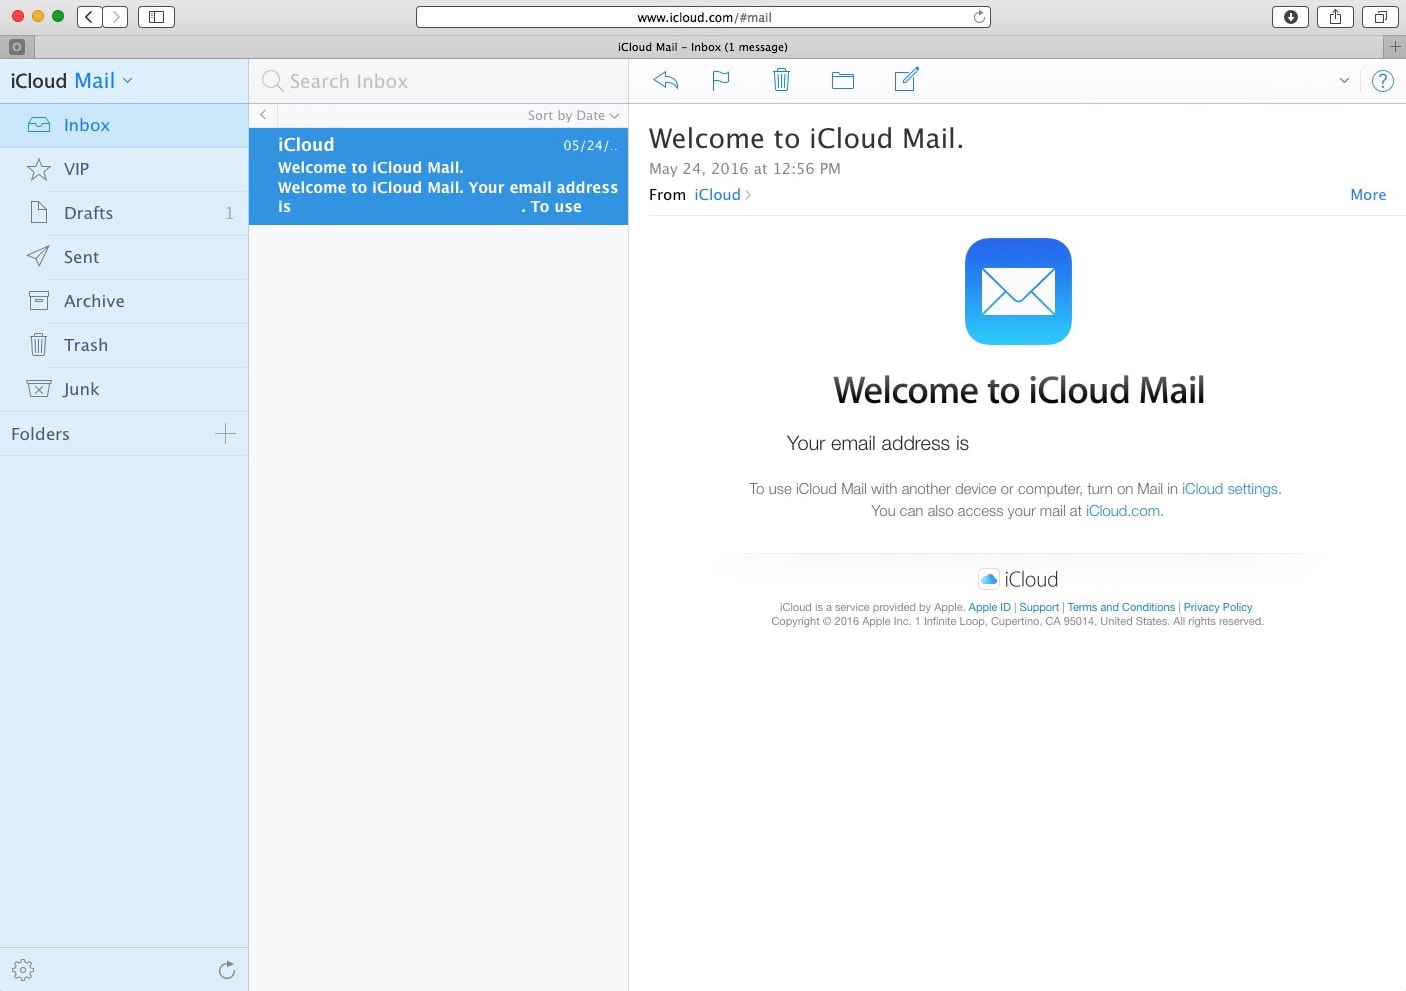
Step 2 – Once logged in to your iCould mail, click on the mail icon.

icloud email login

Step 3 – iCould mail will load and you’ll have full access to everything it offers

icloudemail

Step 4 – Click on the pen/paper icon to compose a new iCloud email

Checking your iCould email doesn’t have to be difficult and also does not have to be done on a Mac. Apple has made it every easy to access their system from any web browser that you’d like.

Keep in mind that you’ll also have access to your notes, photos, calendar, and documents via iCloud. Many Mac users are not aware that they can easily jump onto to a PC and access anything on their iCould from anywhere.

Now that you know how to get into your iCloud e-mail, you also know how to access your entire iCloud. If you need help accessing the iCloud login from your iPhone or iPad check out our how-to guide: How to sign in to icloud.com from your iPad or iPhone.

How to Delete Snapchat Accounts in 4 Easy Steps

Snapchat is an excellent way to share videos, pictures, and stories with your friends. However, when the time comes, many users find it difficult to delete Snapchat accounts from the native application.

The best part of Snapchat is that all your messages go away and self-destruct. No more worrying about whether people are sharing your personal data or not. For these reasons, Snapchat has been increasing in popularity among millennials for the last few years.

However, what if you’re sick of Snapchat and you want to delete your account? Did you ever wonder how you could deactivate your Snapchat account when you’re ready to delete it? There’s an easy way to do this if you’re tired of getting constant snaps all day or you’re just wasting way too much time.

How to delete a Snapchat Account:

  • Step 1: Unfortunately, you can’t delete Snapchat accounts from the native app. You will have to head to Snapchat’s website using your browser of choice.
  • Step 2: Enter your login details and hit the log-in button. Then verify that you’re not a robot and you’re ready to go.
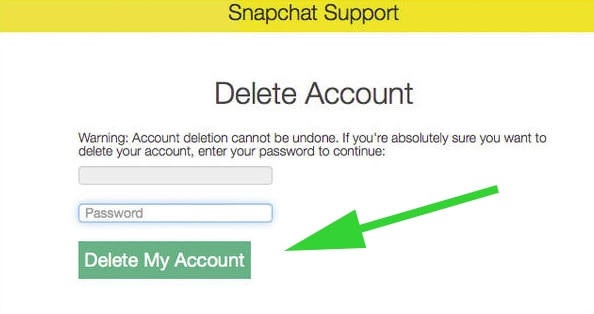
  • Step 3: Once you get all logged in then go ahead and click on the big yellow Delete My Account button on the bottom of the screen.
  • Step 4: You should see an image verifying that you’ve deleted your account and you’re done!
Snapchat Delete Account
Delete Snapchat

Now that you’re not on the app anymore and have learned how to delete Snapchat accounts, what are you going to do with all your free time? First, remember that your account is just deactivated for the first 30 days so if you change your mind then there is still time. All you have to do to reactivate an account that was deactivated, is to simply log-in.

Now you don’t have to wonder how to delete your Snapchat account should the urge ever rise. When you fee like you’ve had enough and it’s time to step away from social media, now you have many ways of doing just that.

How to Delete or Deactivate Instagram Accounts

After spending 5 consecutive hours scrolling Instagram, double-tapping pics, and stalking your ex (you know you did it), you’ve decided that it might be time to learn how to delete Instagram, or at the very least, deactivate Instagram. While Instagram is an amazing tool for both personal and business use, sometimes the addictive nature of social media can get the best of us.

In these moments, you have two choices. You can permanently delete your Instagram or you can temporarily deactivate it. In most cases, deactivating will serve the necessary purpose. However, at times, a full delete might be the best way. This is completely situationally dependent so think about it carefully before making a choice. It’s always safe to use the first option to deactivate, however.

How to Deactivate Instagram Accounts (Temporarily)

Deactivate Instagram

If you’re not sure if you might want your account back then you can simply deactivate Instagram and then all your pictures and settings will be saved for when and if you want to return.

  1. From a web browser, log in to Instagram and click on Profile, then choose Edit Profile.
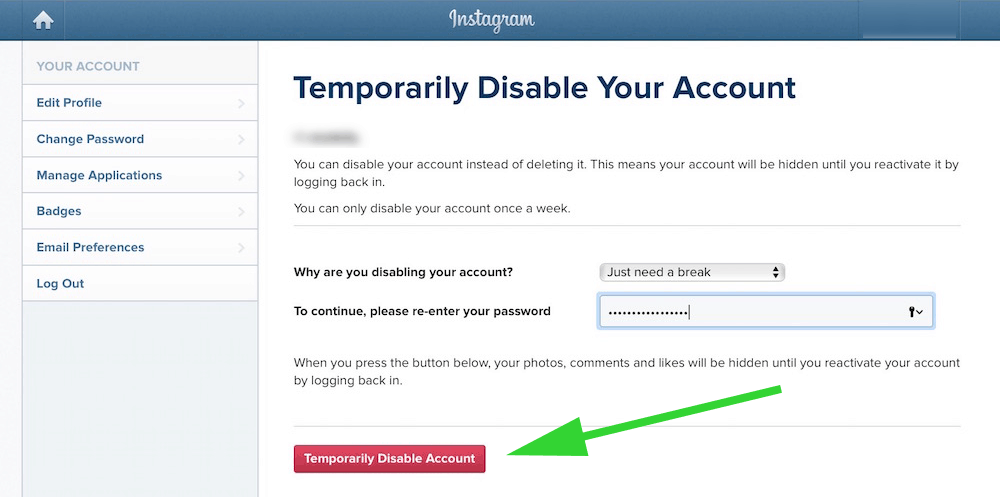
  2. In Edit Profile, look at the bottom corner for the link that says “Temporarily Disable My Account”. Clicking this will deactivate Instagram and you can get it back later.

On an iPhone, simply follow the same steps and, from your profile, go to Edit Profile and then choose “Temporarily Disable My Account”.

How to Delete Instagram Accounts (Permanently)

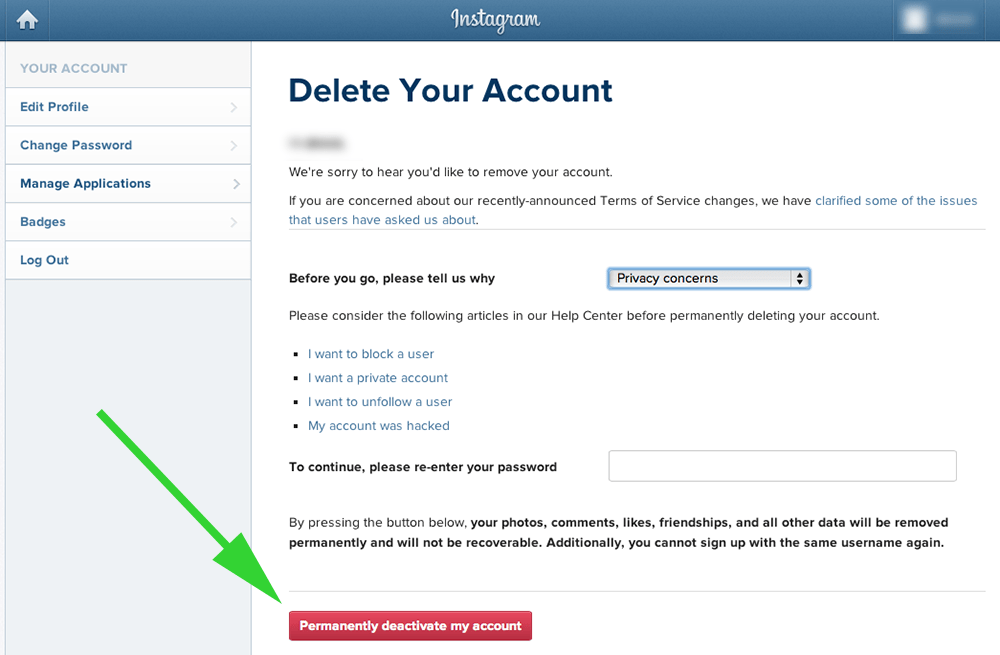
Delete Instagram

For whatever reason, you may need a more nuclear option where you destroy all pictures and setting and delete your entire Instagram account. In this case all posts are also destroyed and your username cannot be reactivated. If you’re going to do this, then make sure to grab all your pictures that you’d like to keep first because you won’t be able to get them back.

Once you’ve made the decision that a complete deletion is right for you, go to instagram.com and go to the Delete Your Account Page. You will then fill out the form, enter your password, and click on “Permanently Delete Account” and it will be gone. Again, there is no way to get it back so that is why Instagram makes you go through a few extra steps to do this.

Whether you’re just wasting too much time browsing and want to deactivate Instagram for a while or you have to delete it permanently, you should know exactly what you need to do now.